Saturday, October 29, 2011

What Makes Me Happy

I've decided that since I haven't had much time to post any new recipes, I'd take some time to show you a few things that make me happy. Pictures, links, videos, enjoy it all! So this girl makes me AND my husband smile. Not very many people can boast that feat.
http://youtu.be/vq7G-Q9ZwC0

My current favorite song ever. And two of my favorite artists collaborating on it.http://youtu.be/wWdxgmzLdwk


This mom is pretty much how I see myself in the future. http://www.waitinthevan.com/


Saturday, October 8, 2011

The Best Stew I've Ever Made


So, I don't know if you've noticed, but it's fall. Well, it's fall here at least. As in, last night, despite sleeping cuddled up with my heating blanket of a husband, I also threw a comforter over myself for good measure.


Fall to me means hot tea, cider, oatmeal, and most importantly: stew. In our household, soups and stews are a staple. We make at least one every week or two. They're frugal, they're filling, and they're just plain yummy.


Now, in this post I'll give you what I put in the stew, but not the amounts; not because it's a secret or anything, I just don't really measure when I'm making stew. Cooking's not about science and measurements, it's about emotion.


This stew started out with a sale on stew beef at Whole Foods, which we took full advantage of. And then we pretty much forgot like any other ingredient to go in a stew. So, while daddy danced for the little monkey, mommy ran to the grocery store for some veggies and such.


Sadly, while I was looking for beef stock, I found that our shitty local Food Lion (which we hate to use, but is literally across the street from our house) no longer carries ANY stock or broth other than chicken broth. I mean, really? I know I live in a backwards, ignorant state and the extent of fine dining is the Ruby Tuesdays in town, but...REALLY?


So, I improvised. Knorr has made this interesting new bouillon type thing. I was hesitant, but I needed beef stock to make this stew, so I grabbed one of these. They're kind of like a concentrated beef stock jelly. Honestly, it wasn't that bad. It dissolved in boiling water (the weird poo looking picture above to the right) and tasted just like regular beef stock, if not a bit saltier.

Hubby had this idea to kind of copy a stew he'd seen on an episode of Bourdain's No Reservations, which involved either turnips or rutabaga. He couldn't remember, so I got one of each. I had never had either. I mean, I've had (and I love) turnip greens, but I'd never had an actual turnip. I didn't really know how to go about tackling this mass of bitter root vegetable, but I noticed the outer skin was covered in wax, which is no bueno, so I just kind of rough-chopped the skin off since it was too thick for a veggie peeler. I did the same with the rutabaga and tossed those in the stock first since I thought they'd probably take the longest to soften.


Next, I chopped up a bunch of green onions, because I couldn't locate leeks at Food Lion. (Curse you, damn redneck grocery hub. Damn you to the depths of hell.) So, I grabbed a regular white onion and added that too. At this point you could probably saute your onion separately, then add them to the stew later, but I skipped that because I had a hungry hubby and a cranky little monkey that was screeching for mommy's attention. (We're currently cutting all four, count 'em FOUR, top front teeth.)


I also began seasoning at this point. You can season with whatever herbs and spices you hold dearest. In our house, we love us some marjoram, thyme, and sage. I think I tossed in more than that, but I can't actually remember...


Next, peel and chop some carrots. All the carrots I got were kind of puny, so I added quite a few. After this picture, I think I cut up about four more to go in, because I'm a huge fan of carrots in stew.


Jason likes his veggies still crispy, but he wasn't cooking, so he got mushy carrots--just the way I like them!


I'm pretty sure you could also substitute the carrots for some parsnips, but with the bitterness of the turnips and rutabagas I wanted the sweetness that the carrots bring to the pot.

I tossed all the veggies in the pot (which, is vastly smaller than I wish it was) and let them cook with the herbs and stock for a bit while I took a break and fed the hungry monster some cheese and crackers.


Oh, also, there's cabbage! I tossed it in after the carrots and added a dash of caraway seeds. We LOVE cabbage! I mean, hubby's Irish so that's kind of a given, and I just love it because it absorbs all the flavor of what you cook it with.


I like napa cabbage for stews usually because of it's added texture, but a head of regular cabbage is bigger, most of the time.

After that, I grabbed a skillet and added butter...a LOT of butter. So, if you're worried about cholesterol or any of that mumbo jumbo, then I guess you can use olive oil instead. But seriously, don't. The butter's there for a reason, which I'm getting to.


When browning meat, for any reason, you must take care to thoroughly dry the meat or it will not brown. Did you hear me? DRY YOUR MEAT. I just use paper towels because it's easily cleaned up, and I find it more sanitary. So, after you dry the meat, flour it and toss it in the butter.


Now, the butter...mmmmm, the butter. After all the meat is browned, add more butter to the skillet and let that melt. Then add some more flour. Are you realizing why you need butter yet? To make this a stew as opposed to a soup, it needs to be thick. To be thick, you need a roux. Now, I didn't really cook the roux like I would have for gumbo or etouffe, because I already had quite a bit of flavor from the meat in the butter. I just cooked it enough to get that raw flour taste out, then added some of the broth, and then added that into the stew.


Now, if you're impatient, sure, you could go ahead and cook that meat all the way through in the skillet, but it won't be tender enough. So, let the stew simmer on low heat for about another half hour, or until you just can't stand it any more.


I had a bowl of this delicious stew, then realized there was nothing to sop up the broth at the bottom of the bowl after all the good, chunky veggies and beef were gone. So, I tried my hand at making cornbread. The reason I'd never made cornbread before is because my best friend's mom, Mama Peggy, makes the BEST cornbread I've EVER had, and I was always afraid of falling utterly short of that golden goodness. But, I needed cornbread. It was essential. So I grabbed Mark Bittman's "How To Cook Everything" and looked up his easy-peasy recipe. It was totally simple, but completely delicious. I ate half the pan myself... And then my bowl looked like this. <----- Happy, empty bowl!


I found that the next day, this stew is even better because the flavors have had time to marry completely. I also found that I really like turnips and rutabagas. They're delicious in stews, so they'll become an always ingredient, much like carrots.


Little monkey also seemed to like them, which is a good thing. Even though he was fussy most of the time I was making the stew, he was not fussy while nom'in on some cooked carrots and some cereal.


That's it for now. Until next time, enjoy your loved ones and your life with a Spoonful of Sugar!

Tuesday, September 27, 2011

Apple Cake and Simple Fare

Apples = Good

Cake = Good

Apple + Cake = Greatness


So, I'm doing this post for a very special friend of mine named Wendi. She requested the recipe for my apple cake, and with her being a brand new mommy, how could I not share? But then I thought, what was it I wanted when I was a new mommy? Simple, hearty fare.


My son was born 2 days before Thanksgiving last year, so when we went home on Thanksgiving, there was a ton of food that my mom had lovingly slaved over. So for about a week, we were good on leftovers, but then my mom (known as "Mimi" to the little monkey) went back home and we were on our own.


Now, I don't know if you, dear reader, have ever had a baby, but it's hard those first few weeks. Hell, it's hard those first few months! I think I maybe got an average of 3 hours of sleep a night for the first month, and little monkey didn't start sleeping through the night until he was 7 or 8 months old.


So, for the new mommy, I've decided to include a few really great, simple recipes.


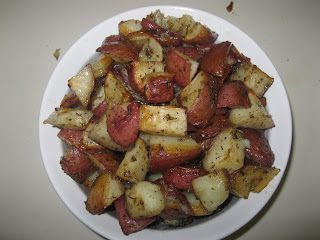
To start, my Irish Apple Cake


For the cake:


1 lb. apples of your choice (I usually up the apple amount because you really can't have enough apples, and I use either Gala or Pink Lady.)

1 and 1/4 c. flour

1 tsp. cinnamon

a pinch of salt

1/2 c. butter, plus extra for greasing your pan

1/2 c. sugar

2 eggs

2 tbs. milk


For the streusel topping:


Generous 3/4 c. flour

6 tbs. butter (diced)

1/2 c. sugar


To make:


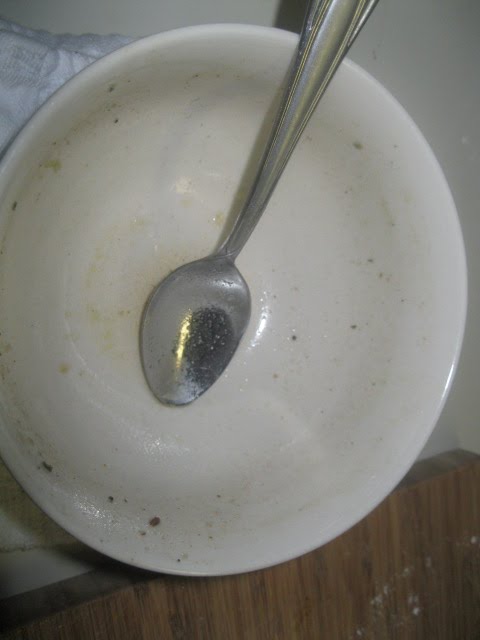
Preheat your oven to 350 degrees, and grease a 9 inch round pan. I used my white Corningware, and it worked perfectly. Make the streusel topping by cutting the butter into the sugar and flour until crumbly. (I added some nutmeg and cinnamon at this stage, because they're yummy and nutmeg helps your brain function. True story.)


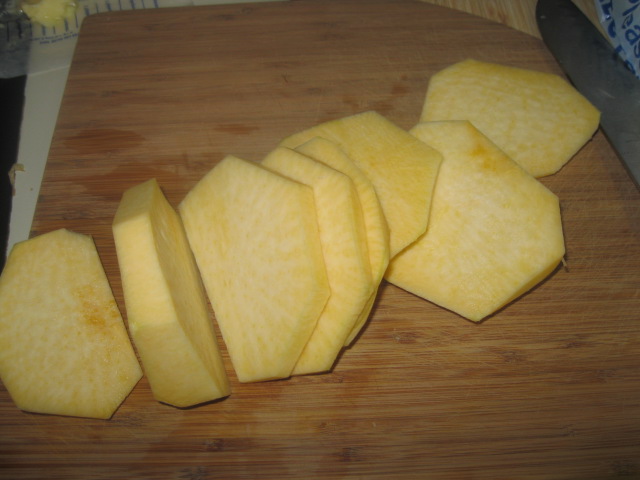
Peel, core, and thinly slice your apples and set aside.


Mix all the other cake ingredients together. Spoon the batter into your pan and smooth the surface (or don't, because no one's going to see it under all those apples!) Gently and lovingly and with the utmost affection and car begin to layer your apples over the cake batter. Use them ALL. It may look like a lot of apples, but trust me, it's SO FREAKING GOOD.


Now, over that gorgeous layer of mouth-watering fruit, sprinkle your streusel topping as evenly as you can. Now, stare appreciatively at your cake-to-be and whisper sweet nothings too it. (No really, do. The more love you cook with, the better it tastes.)


Bake for an hour, then remove from oven and let cool in the pan. If you wish, you can dust the cake with powdered sugar, but I find this step unnecessary.


And that's it! All done! Unless...


If you'd like to gild the lily as they say, please do so by dolloping a big ol' scoop of vanilla ice cream. Or caramel ice cream. Or whatever bloody ice cream you favor the most. Now take a big ol' spoonful of that bright, warm, delicious cake and shove it unapologetically into your mouth.


Now, since we've taken care of the cake, on to the mommy food.


For some delicious, easy soda breads, I always turn to my favorite Irish cook book. I'm a fan of the brown soda bread, because I feel it has a nuttier, fuller flavor than white soda bread. Here is a recipe for brown soda bread.


For some simple crock pot meals and soups, simply scroll down to some previous posts like this one on a Greek chicken and rice dish, or this one on two great soups.


I'm a huge fan of Cook's magazine as well, and as a new mommy, you deserve something to read for those marathon nursing sessions. Luckily, I have a magic fairy godmother (my best friend Evie's mama--my second mother--Ms. Peggy) who gave us a subscription to Cook's Illustrated for our wedding. It's a great gift for the foodie we all know, and for a year of magazines for about $20.00, it's a great investment.


I have a good friend who's Iranian, and her mother makes the most amazing dish that I am slightly obsessed with. And for a little effort, you get a lot of great leftovers. It's called Zereshk Polo. In Farsi, Polo means rice, and the dish is a chicken and rice dish for those that like sweet and savory together. It's fairly easy to find recipes online, but I like this one by Chef Kshar because the video shows you each step.


Now, to some, the thought of roasted marrow bones might be exotic fare, but I love them, as does the hubby. And they're actually really good for you! The marrow has tons of great fats to help baby with brain development, and can actually lower cholesterol. Roasted marrow bones are actually the chosen last meal of my favorite celebrity chef and potty mouth, Anthony Bourdain (or as he's known by little monkey, "Uncle Tony") Here is a good recipe for them.


I'd love to post even more delicious food, but sadly, my little guy has just awoken from his nap and it's time to go back to being mommy again. I hope these recipes and links help all you find some great new foods to try, or some inspiration to create your own recipes. And to Wendi, enjoy this time with your little cowgirl, because they'll be the best days of your life.


As always, until next time, enjoy your loved ones and your life with a Spoonful of Sugar.

Sunday, September 25, 2011

Soup for Two

Soup.


Makes you happy doesn't it, that word? Soup. When I was younger I remember the cans of condensed mush that tasted like a tinny salt-lick as opposed to something you'd cherish the memory of. (That being said though, when my throat's a-scratchin' I seek the comfort of a bright crimson bowl of Campbell's Tomato. I know. Ew.)


My husband and I love soups and stews. I think it's the process. Chopping the vegetables, adding the spices, stirring the brew ever so slowly. It's theraputic. As is the result.


Recently, we decided to make two different soups. I wanted to make chicken soup from scratch, because I'd never attempted it and it sounded both thrifty and delicious. We got a whole chicken to boil, about 5.5 lbs, and it produced a LOT of chicken in the soup. I won't go through the recipe for the chicken soup, because it's kind of a 'to-each-his/her-own' thing. We added chicken, onion, garlic, carrots, celery, oregano, parsley, and a lot of black pepper. I chose not to add noodles or rice, finding that even when done properly, the grains suck up too much of the liquid.


Last night, we made Lentil, Kale, and Sausage soup. I based our soup off of this recipe. I told my husband that I didn't like lentils, to which he replied, "You just haven't had them cooked properly then." I could believe this. I'd only ever had them at home, prepared by my step-dad, and let's just say that though we owned a full cabinet of spices, salt and pepper were the favorite sons. The lentil soup he'd prepared for us on numerous occaisions (and that my sister and I had made excuses not to eat) was more of a gruelish mush the color of mud and fog. Not very warming is it?


You can understand my hesitance to trust the hubby about lentils now, yes?


Anyway, we bought some french lentils from Whole Foods and they sat in our cabinet for a week before I found a recipe that looked interesting enough to try. I mean, with sausage in the name of the recipe, what could be bad right?


To the right you will see all of the lovely ingredients that went into the Lentil, Kale, and Sausage soup, here on out called LKS. I decided not to add the balsamic vinegar, because honestly, I don't like it. I'm not a vingar type of gal. I mean, I get why it was in teh recipe, to cut the fattiness of the sausage. But really...why would you want to do that? Here's the part where, if you're on a low-fat diet, you click the X at the top right corner and wonder away to enjoy some rice crackers.


Sausage. Mmmmm. Hate to say it, but it's one of my favorite foods. Kielbasa in particular. And in this recipe, it lends itself SO well to the flavor of the soup. I used no seasoning in this other than the garlic that is called for, and honestly, I think you could even leave that out.


Ok, so you take the kielbasa and cut it into whatever size pieces you wish to have, then sautee it until lightly browned. Don't worry about cooking it all the way through though, because it's going back into the soup. You take the sausage out of the pan and put on a paper towel lines plate. Leave the fat in the bottom of the pan.


Using that fat, you're going to sautee the garlic and onion until tender and slightly transparent. We're not lookin' for caramalized onions here, though if you wanna do that, I'm sure it would be delicious. Also, I added some celery we had left over from the chicken soup as well. Just add it in with the onions if you're using it.


Once the onions have gotten soft, pour over the water and broth. Add the sausage back in and add the lentils. (I doubled the amount of lentils and probably doubled the broth too. I wasn't really measuring, because that's the great thing about cooking.)


Let the mixture simmer for a while, about 30 minutes, then add the kale (de-ribbed) and let it simmer uncovered for about another 10 minutes.


The recipe I used calls for the balsamic vinegar, and if you want to use it, now is the time to add it, and then serve.


When your soup is done, you will have a gorgeous, light broth that's fantastically fragrant and dotted with little brownish green lentils, bright green, leafy kale and tasty pink sausage.


Now is when you take a spoon, dig into that delicious puddle of molten tastiness and moan. Yes, moan. It's alright, no one's going to blame you. So go on and moan, make little whinning noises, even giggle if you'd like to. Pour yourself a glass of wine and relax.


But, if you're really a gluten for punishment, and this just isn't rich and delicious enough for you, then please do as we did and make these. Go ahead, your taste buds will worship you.


Until next time, enjoy your loved ones and your life, with a Spoonful of Sugar.


Thursday, September 15, 2011

AUTUMN NUM NUMS!

So, it's officially fall, whether the temperature says so or not. Fall is my absolute favorite time of the year, because it means 3 things for me: pumpkins, apples, and pears.

Pumpkins are one of my favorite-est things in the whole world. They're so versatile and delicious, and they are SO good for you. Jason, my husband, is also a pumpkin lover...mostly when it's baked into his absolute favorite dessert: pumpkin pie. Luckily, we seem to have passed this trait onto our little monkey, so scarfed down some pumpkin, sweet potatoe, and coconut milk for breakfast this morning.

This year, I'm planning on making my own pumpkin puree instead of buying it canned, which they add color too and who-knows-what-else. I've never tried it before, so I'm kind of worried, but if all else fails, it can be baby food!

Apples are another one of my favorite foods. I've always loved apples, but I think my favorites are Gala and Pink Lady apples.

My favorite fall beverage--besides mulled wine (yum!)--would have to be apple cider. We have a juicer, and this year I'd like to make my own cider instead of buying jugs of it.

I'm also slightly obsessed with apple cake. Ok, that's a lie. I'm obsessed with any apple pastry. I recently made an apple galette and almost ate the whole thing. A while back we got a bunch of apples from Whole Foods and I ended up making 3 apple cakes in a week. :/ So. Freaking. Good.

Pears are delicious. There's nothing else to say. You can poach them, braise them, and best of all: they are amazing when you add booze. Port, wine, brandy, whiskey, all of them make pears that much better.

This year I'm planning on buying and trying to replicate some of these. They look amazing. The owner and baker at Tatte's makes a shortbread type of crust into a tart box and fills them with pastry cream, then lays these gorgeous pears on top and bakes it off until they're a luminous golden color. She then showers the already glorious tart with almonds. OH. MY. GOD.

I will make this. But first, I will enjoy shoving that sinfully delicious original tart into my yum-hole and savor every single crumb, even if I have to lick the plate. I've been waiting to try this tart since I first saw it shown on Cooking Channel's Unique Sweets. (Can you tell I'm just a little excited about this?)

Other things I'm excited about that don't involve food (shock!):

1. My son's first Halloween. (This is one of the costumes we're considering! SO CUTE!)

2. The 2nd anniversary of when Jason and I met.

3. Going to visit my family and friends in Memphis.

4. My favorite (non-chocolate) candy being in season once again! (Hint, hint mom.)


Little Monkey enjoying pumpkin and sweet potato soup.


That's it for now. So until next time, enjoy your loved ones and your life with a Spoonful of Sugar.

Tuesday, September 13, 2011

Inspired Revisited

So it's been a while friends, but I'm back.

I wrestled with the idea of posting this, since I hadn't gotten any sort of comment on the last post, but I decided I would post it anyway.

Our shopping for the past week for groceries was all done in one day: Friday.

We went to 2 stores: Sam's and Whole Foods. (We go to Sam's to stock up on freezer stuff like fish fillets and chicken. And Goldfish for my husband, because he can eat a whole bag in one sitting...)

I've misplaced the receipt from Sam's, but the total amount we spent there (and mind you, this is for 2 weeks total) was $118 and some cents.

At Whole Foods we bought all of our fresh produce and the majority of our meet (and all the baby's food.) We spent $160 even, because we donated a dollar to the school gardening fund.

So in all, give or take, for two weeks of grocery shopping in one trip, we spent $278 and some cents. So, for a week in a household with 2 adults, 1 baby, 1 cat, and 1 dog we spent roughly $139.

So it's not terribly expensive to eat healthily on a budget. We got 3 different types of tofu (mainly for the baby to eat for finger food, but Jason seemed to like it cooked up with some sesame seed oil, soy sauce, red pepper flakes, and Sriracha sauce), a bottle of wine, 2 loaves of organic bread, 3 cans of coconut milk, 3 cans of pumpkin, a bag of frozen chicken thighs, and 3 different types of sausage. And those are just the bigger items.

I have a bit of a cold on, so this is all I can manage for the time being. It might not make much sense, but I'm blaming the Benadryl.

As always, enjoy your loved ones and your life with a Spoonful of Sugar.

Saturday, September 3, 2011

Inspired


Tonight I find myself rather bored with a stuffy nose, and therefore stumbling about online looking for new kitchen inspiration. And wouldn't you know--I found it.


I read and looked at this article and the pictures and was amazed. I won't spoil it for you, because I think everyone should look at this. Everyone in America should look at this and see if they find it as appalling as I do. In Chad, Africa, for a family of 6, the weekly expenditure on food (as in all the food they will eat that week) is $1.23 AMERICAN. That's not even a tall latte from Starbucks, and yet, a family of 6 can live...no, I won't say live, I'll say exist...on that for a whole week. And, existing is not fun. Surviving is not fun.


Inspiration. Right, that's what I was going to talk about.


So, this next week, I vow--I SWEAR--to right down everything we buy (groceries that is) and the price. We live on a budget in our single-income household, a budget that isn't the same from week to week. I think we actually do quite well with our budget, but sadly, we like to eat too well. Yes, I can buy 5 packages of Ramen for $1.00, but I'd rather buy 1 steak for a much higher price, or 1 lamb shank, or a few sweet potatoes.


This week, this week I will take care. This week, I will be meticulous.


No, this isn't a money saving venture, although, if it turns out to happen like that, so be it. If I happen to not buy that bottle of wine after all, or decide that we don't really need more butter, or sugar, or something, than so be it. Maybe that's a good thing.


Maybe it's already a good thing.


My younger sister just went off to college, and I love her to death, but I don't think she has a clue about the cost of living. I know I didn't. I never once thought of how much money my parents spent on food when I was dependant upon them. Now, as a parent myself, I'm already giving up things I would like to get things for my son. I'd rather him have some silly new toy he'll only play with for a few days than a good bottle of olive oil or a bag of great coffee.


I guess I've rambled quite a bit, but I'll go ahead and blame the benadryl on that. Well, I think that's all I have tonight really. Or, that's all my brain can come up with that'll make sense. And, my pillow is calling me.

My little man, showing an early zen for organic, homemade crackers.


Until next time, enjoy your loved ones and your life with a Spoonful of Sugar.

Thursday, September 1, 2011

Banoffee Pie!


Good day all! I've been meaning to upload this recipe for quite a while, but, if you read my friends' (Evie and Mel) blogs, you'll know that for a while we were caught up with spending time together after having not seen each other for months and months and MONTHS! Now, to make up for my complete lack of discipline when it has come to posting, I am going to gift you with the most amazing pie recipe I've ever tasted. Ok, that's probably a lie because I'm only slightly obsessed with pecan pie, pumpkin pie, and apple pie. All in a very...healthy...kind of way. (Now that's the lie.)

The first time I ever heard of Banoffee pie, that I can remember, was while watching one of my favorite movies, Love Actually. (Keira Knightly's character offers her husband's friend a piece of it, then calls it a horrific choice of pie, which would lead to many a person not paying it any further heed.)

Banoffee pie is actually, very simple. But in its simplicity lives some of the most fantastic flavors. I am a total sucker for anything involving bananas. Add graham cracker crust and homemade whipped cream and I'm putty. But wait...what is this you say? There's CARAMEL too? Oh god, I can now die a happy woman.

Considering the ingredients of this pie, it's not only delicious, but thrifty as well. If you're like me and on a budget, but you have an insatiable sweet tooth (hello maternity pants, I knew I didn't put you away for a reason!), than this is the pie for you.

To make Banoffee Pie you will need:

1 graham cracker crust, homemade or store bought (I used store bought.)

1 can sweetened, condensed milk

3-4 bananas

1 half pint heavy whipping cream

1 tbsp. 100% pure maple syrup

1/2 tsp. vanilla extract

cinnamon for garnish

A stock pot full of water

To begin:

Take your can of condensed milk and remove the label. A bit of adhesive left on is fine though. In your stock pot, bring water to a boil. Place your stripped can of condensed milk straight in there (unopened) and let the water boil for 3 hours. (Yes, I said 3 hours. Hey, I said it was simple, not quick.) Some of the water may boil off if the lid is kept off because you have somehow misplaced it (tee-hee...) but that is simple to remedy. If it boils off and the top of your can is no longer covered, simply pour over some hot water from your tap. (You may have to do this more than once.)

While your can is boiling away, pour your heavy cream, maple syrup, and vanilla into a medium sized bowl and whip it into delicious, fluffy whipped cream. (I didn't add any processed sugar to the cream because the pie is sweet enough without added sweetness to the whipped cream.) Put your whipped cream aside in the fridge so it can stay cool.


After the 3 hours are up, take your can out--preferably with a pair of metal tongs please, don't want any burned fingers--and place it on a cooling rack. Let that cool down for about 20 minutes.

Take out your graham cracker crust and open the can of condensed milk. Now, prepare yourself for what's inside, because it will change your life.


Inside your thouroughly boiled can of condensed milk, will be a delicious toffee sauce that didn't call for any dangerous boiled sugar and constant watching and stirring.


You are now going to take the toffee sauce and spread it around in your graham cracker crust. It's up to you whether or not you use all the toffee sauce. I mean, I did, but then again, I'd have eaten it out of the can if I had a little less will-power.


Now, for just a moment, please enjoy the beautiful, unmarred, golden brown pool of toffee sauce. I think I stared at it for quite a while before even considering adding the rest of the ingredients. Because really, it's toffee and graham cracker crumbs. How can you make that any more perfect?


Bananas. That's how.


Take your bananas and remove the peel. I decided to slice the bananas fairly thin, so that when cutting the pie, the bananas would cut smoothly.


Once your bananas are sliced, begin linning your pie crust with the slices. It's up to you however you place them. I do circles and then just pile towards the center with the leftovers.


After your bananas are all gently placed on their delicious toffee puddle, you're ready for the whipped cream. (Do ya get it yet? Bananas. Toffee. Banoffee.)


Pile the whipped cream on--yes all of it--the bananas. It may seem like a lot of whipped cream, but I love it. It's your pie though, so it's up to you how much whip you put on top, but I think it'd be a shame to waste homemade whipped cream, especially when it has just the slightest maple taste and a clean, vanilla finish. After that, just dust it with a little bit of cinnamon. (Or, if you're a gluten for punishment, I'm pretty sure you could drizzle some chocolate sauce over top.)


After that, just slice and enjoy. (And, just so you know, this pie doesn't slice clean. So, when some of those bananas or some of that toffee sauce is left over, just slip it right onto your plate. You may all have the same sized slice, but somehow your serving is just a bit bigger...)


That's it for now! Until next time, enjoy your loved ones, and your life, with a Spoonful of Sugar!

Tuesday, August 23, 2011

Mama's Gonna Preach

So today's post is going to be a little different.

Sorry in advance to all you closed-minded sheep out there. I am all about putting good food and good drinks into my body, and my family's bodies. Today I found out that according to our wonderful government, it's okay for companies NOT to label their products as using genetically engineered things or genetically modified things. REALLY? No...REEEEALLY???

Here are some companies, which I admit, I buy products from (strike that...USED to buy products from), that use GE foods. Kellogs, Kraft, Morningstar Farms, M&M and Mars, and Coca Cola. Honestly, I don't care that I've accidentally eaten a few GE things here and there over the years, but how dare they not label things that I might possibly give my child?

I think it's extraordinarily screwed up that to be healthy and eat healthily in America you have to spend oodles and oodles of money. I love organic food, but why can't it all be organic? Why can't everything cost as little as the non-organic, cheap, bad-for-you, and not-so-good-for-you foods cost? The government. That's why.

Because the government pays farmers to produce soy and corn and they put it in everything. High fructose CORN syrup. They feed corn to the cows, which isn't the best thing they could be feeding them, which in-turn, makes the products you buy from those cows not the best products you could be buying and eating.

I know I sound like one of those weird old hippie moms that breast-feed in public, don't shave their under-arms, and smell like patchouli, but...maybe I am. Maybe in my quest to better myself and my family I've turn into something and someone I would have made fun of in the past. And honestly, if that means that my son is going to be healthier and live longer than other children who are being fed happy meals and easy mac every night, then I think I'm okay with that. If eating organic, local food that's never even heard of hormones or antibiotics makes me someone to be made fun of, then laugh away America. I'll still be here munching on my delicious, flavorful, good-for-me food while the fast-foodies are 6-feet under after suffering massive coronaries.

Okay, now that's over. It might not have made the most sense, because I tend to be non-sensical when I'm this wound up. But hopefully, somewhere out there, one of you is making a decision. Maybe instead of going and getting those chips out of the pantry, or having another grease-trap burger and fries tonight, you'll check out your local organic store. Maybe you'll suddenly find that meat CAN taste better. (Mmmm, tasty, tasty meat...) Or that an organic cucumber is about the tastiest damn vegetable you can put into your tummy (in my opinion.) And that's good enough for me. If you're just angry that I yelled about organic food and how the government is trying to screw us all into an early grave, then that's okay too. I'll just make sure to dumb the wording down on my next post for you.

Until next time, enjoy your loved ones, and your life with a Spoonful of Sugar. (Or honey, or Stevia, or Truvia, or date sugar, or whatever non-processed sweetener you choose.)

If you would like to learn more about GE foods and how to avoid them, please visit these websites:

http://organicconsumers.org/monsanto/index.cfm

http://www.nongmoshoppingguide.com/

http://www.foe.org/

http://www.organicconsumers.org/gelink.cfm

Sunday, August 21, 2011

It's All Greek to Me


Hello all! I thought I'd share one of my favorite weeknight dinners with you all. My husband was kind of dubious about this the first time I described it to him. In fact, it took me 2 weeks to convince him it would be a good, affordable dinner since all we would need to get from the grocery store would be chicken and lemons. (We tend to be unable to keep meat in the house for too long, since we're both such voracious carnivores.)


Finally, he conceded and off to the store I went. Now, we used boneless breasts because our favorite grocery store which is literally across the street from our house has recently changed into a much lesser entity. What was amazing and fantastic before is now mediocre...if that.


We used to be able to find many cuts of lamb and veal, now there is none. Where we used to find delicious, fatty chicken thighs, there are now only chicken tenders and breast. (And about that...what body part exactly is the damn tender? Like, seriously, we needed to make up a chicken part to serve to our children? Really...REALLY? Parents, let's get off our asses and broaden our children's food horizons.)

Anyway, the recipe is basically a Mediterranean style chicken "casserole" with rice. It's very delicious and flavorful, and you get a lot for what you spend. Especially if you're anything like my husband and you think that buying a HUGE bag of rice from a buy-in-bulk store is a good idea. (We don't have to buy rice ever again. EVER.)


You can also use pasta for this, but i like the flavor that the rice can lend to the dish, especially if you use Jasmine rice. (And just think, if you make too much rice, you can always make rice pudding!)


To make this dish you will need:


Boneless, skinless chicken (we like the thighs, but please use any cut you prefer)


Olive oil


Kalamata olives


Capers


2 cloves garlic


Half an onion


2 lemons


1/2 cup white wine (We tend to make recipes that call for white wine after my mother has made a visit. She loves the stuff, but no one else drinks it, so we use it for cooking. Last visit we made viener schnitzel with the leftover Pinot Grigio!)


Your favorite Mediterranean spices


Rice


So, in a skillet, lightly brown your chicken and then place the pieces in a glass or metal casserole pan. (We used a brownie pan...)


Heat your oven to about 350 or 400 Fahrenheit.


Into your casserole dish, add some capers and olives. If you wish, you may sweat the onions and garlic together in your skillet and then add it to the dish, but it's not necessary. Over the delicious heap of olives, capers, garlic, and onion, squeeze one of the lemons. I also slice the lemons and add a few on top. (It's kind of a to-taste thing. If you like lemon, use 2, if you aren't especially fond of it, just use one.)


Drizzle a bit of olive oil and white wine over top, then sprinkle with your herbs. (I tend to be a bit heavy handed when it comes to oregano. It's one of my favorites.) I also poured a bit of the juice from the olive jar over top, but that's purely up to you.


Place your delicious chicken dish into the oven for about 15-20 minutes, long enough for you to make your rice. Now, I'm going to assume if you're reading this, you know how to make rice. I won't bore you with those steps, because if you don't know how to make rice, you probably shouldn't attempt any great feat in the kitchen... Stick to peanut butter and jelly...


When the timer goes off, you're ready to serve. Place the chicken and some of the juices over the top of your rice, and enjoy!


That's it for now lovelies! Until next time, enjoy your loved ones, and your life, with a Spoonful of Sugar!

Tuesday, August 16, 2011

Homemade Lox (Cured Salmon)


Good evening all! I hope this evening all finds you well. We've had a long day at our house, and a longer afternoon.

After buying an organic brand of vegetable beef stew for my son to try, I figured out that he's not quite ready for it yet (even though the package and the doctor both said 8 months and up is fine for beef). Not only was I thrown up on, but while trying to clean us both off, the little guy decided to pee on me as well.


So, sufficed to say, this night is going to be laid back in the kitchen. (Don't tell, but I'm even considering ordering in a pizza...)


But, before I pass out and am dead to the world, I thought I'd post this little gem for you all to ponder.


LOX! That's right, it's finally ready! After 72 hours in our fridge, our GORGEOUS flank of home-cured salmon was ready to come out and fill our bellies full of salty, dill-iciousness!


Now, if you too would like to cure your own salmon instead of dropping $13 for only 4oz. of "lox", then read on my friend!

Things you will need:

2 lbs. salmon with the skin ON (we always buy wild-caught!)

1/4 cup salt of your choice (regular table salt is fine, but I adore the pretty pink color of the Hawaiian salt)

1/4 cup sugar

fresh dill (we bought two of the fresh herb containers you can find in grocery stores)

fresh ground white or black pepper to taste (I stopped turning the pepper mill when I started sneezing...)

a container that your salmon will fit in

plastic wrap

something to weigh your fish down with (we used canned things we'd had in our pantry for quite a while, but wine bottles work fine, as do ceramic dishes filled with dry beans)

To start, check your salmon for bones. Place a layer of salt, sugar, dill, and pepper on your plastic wrap. Lay your salmon on top and cover with the rest of your seasonings. I gently massaged the salt into the fish and whispered sweet nothings to it, but who's to say if it helped?

Once your salmon is thoroughly seasoned, wrap it up super tight in plastic wrap and place it in your container, then stick your weights on top and ta-dah! Stick it in the fridge and 24 hours later, go back and drain the liquid out.

Drain the liquid in the container for 2-4 days (we did 3). You can start tasting your lox after 48 hours (because it'll be safe by that point).

When you've decided your lox has cured long enough, take it out and rinse all the seasonings off of it.

Slice it thin and you can store it in your freezer for about a month or so (or eat it all right away with lox-loving-friends!)

I ate mine with my homemade cream cheese and some plain bagels. Sprinkle a little sea salt and pepper over the top, or if you're one of those capers, tomatoes, and onion likers, go for that too! I hope you'll all go try this out, because in the long run, you save SO much money making your own. 2 lbs. of fish for about $18, or 4 oz. for about $12? Which will you choose?

That's it for now! So until next time, enjoy your loved ones, and your life with a Spoonful Of Sugar!

Friday, August 12, 2011

Homemade Cream Cheese


Hello and welcome! For the inaugural post on Spoonful of Sugar, I've decided to (try to) make cream cheese at home.


It all started when I was watching the Cooking Channel and saw that a chef in a New Orleans restaurant made his own lox. Now, before you say anything, let me explain a little bit about my secret obsession. In the restaurant business, there is a well known game that chefs play called The Last Meal. You go around the table (or bar as it is most times) and ask what you would eat for your last meal.


For my last meal there'd be quite a few courses, most of which would include sugar, but the head-liner would be a fresh, hand-crafted bagel with delicious cream cheese and lox. Lox is salmon, NOT SMOKED SALMON. I repeat: lox is NOT smoked salmon. In fact, lox is raw. Don't freak out, raw isn't always bad!


Anyway, back to New Orleans. This chef was curing his own salmon on sight, which was inspirational. The basic method is to get yourself a big ol' slab of fresh (wild-caught if possible) salmon. We chose a 2 lbs. slab of Keta Salmon from Whole Foods. Next step, slap that baby on a big roll of plastic wrap and begin to bury it in equal parts sugar (yes, sugar) and salt (we used Hawaiian Pink Sea Salt.) Next, grind some fresh cracked pepper on top, black or white, and then lay on some beautifully green, fresh dill sprigs. Wrap it all up in plastic wrap really tight, put it in a plastic or glass dish, weight it down with canned goods or wine bottles (because you know you've got a few bottles of Pinot Grigio in that fridge gal pal...) and wait.


Now, you know about the lox, but this is about cream cheese. And as a warning, you should know that in this blog, there will be many tangents.


So! There are many ways to make cream cheese, but we're going to focus on the simplest way, the one that I chose. You need 1 ingredient. Seriously! One ingredient. Ready? Yogurt. Now, I used "The Greek Gods" brand Greek yogurt from Whole Foods, which I probably won't do again because when tasted, it was a bit too tangy in my opinion.


To make Cream Cheese you will need the following:


1 container plain yogurt


1 bowl


1 dish-towel or cheese cloth (either will work, so don't worry about going out and hunting down cheese cloth.)


some twine, string, rubber band, duct tape, wire, etc., etc. (Basically, anything with which you can tie a knot.)


Now, find a space in your house that's relatively cool, and has something from which you can hang your cheese.


Unfold your dish towel and plop a bit of yogurt into the center. We're not talking the whole container, just enough for a test-batch. I used about 1/2 a cup or so.


Now, wrap the yogurt up in a ball shape and twist the towel to secure. Liquid WILL drain out. Don't worry, that's what's supposed to happen. This liquid is whey, which, if you're very daring, you may save to make ginger-ale and numerous other goodies.


Tie your little cheese bundle up and hang over your bowl to let the whey drip out.


Wait 7-10 hours. (Overnight is fine too.)


Now, when you wake up or your timer goes off you'll have fresh, homemade cream cheese to spread on anything you want. Hell, eat it with a spoon if that's your thing. We don't judge here.


I hope you all thoroughly enjoyed your cream cheese tutorial, and all of the ramblings that went with it. Think of them as your side salad, or for those of us who aren't very worried about carbs, your fries! :)


Next time, we'll start talking about that salmon again! It went in the fridge last night, so hopefully in a day or two, the Murphy household will be feastin' on fish!


That's it for now! So until next time, enjoy your loved ones, and your life with a Spoonful Of Sugar!